|
 |
 |
 |
Check out
|
|
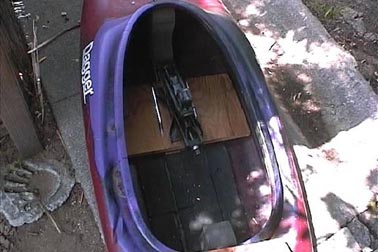
< < Back to Outfitting Raising a cockpit rim by Space_Canoe (with a few additions by CBoats.net) Please note: Like alot of other outfitting alterations you may do on your boat, this may void any warranty your boat has, and depending on the boat may or may not weaken it structurally. Please think about the effects your modifications may have on your boat BEFORE you make them, and use the appropriate precautions if you modify your boat (working in a well ventilated area, wearing a respirator and other safety equipment as appropriate). Raising the cockpit rim will give you more room for your legs, especially if you (like a lot of us) are graced with "powerful thighs". Materials RAISING THE COCKPIT RIM The next step is to raise the cockpit rim so it's easier to get into and out of these little "shoe boats". The first thing I do is try to find someone either: passionate enough about boating/masochistic enough in particular/idiotic enough in general to want to assist you in this project. There are a couple of steps that are just made immensely easier by having two pairs of hands available. First you make a form to jack up the cockpit rim. I think you want to build a form that goes always around the cockpit ring and not just jack up a 2 x 4 across the cockpit ring from side to side. You want to do this before you place the tubes on the side so that there's less chance breaking them when you put the form into its final position. I just cut mine out of (fairly thick) plywood and placed a second piece on top of the first piece to adjust for the change in height of the cockpit rim from the front to back.
I then put a flat piece of plywood on the bottom of the boat so that I could jack up the form under the cockpit rim with a simple car jack. On top of that I put a couple of more pieces of wood so that I would barely have to raise the jack. This gave a slightly better stability.
I also made sure that the boat was on a flat hard surface. I then cut a hole in the cockpit form so that I could raise and lower the jack with a handle.
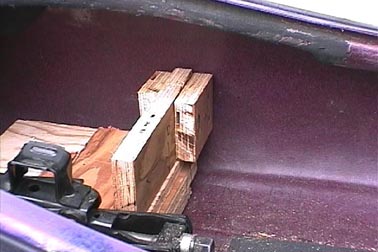
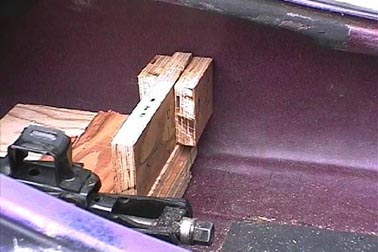
Youneed to have some way of turning the jack with a handle that comes down into the cockpit at a right angle to the jack itself. Since you want pressure equally around the entire rim, you have to cover the entire cockpit area with the plywood form, leaving no way to have one of the rotating handles coming out of the jack that comes straight back along the bottom of the boat. When you jack the form up, the sides of the hull will dimple in unless you brace them. My solution was to build two little "arms" that fit fairly tightly between the side of the hull and the jack, on either side of the jack itself. On this particular boat, the ends had to be rounded slightly; a flat piece of plywood wouldn't work.
I then laid them on top of the flat piece of plywood that the jack was resting on, and once the rim started to move up, they were pushed in and locked against side of the jack itself, making the "arms" and jack one rigid piece from side to side, thereby not allowing the sides to come in any further (in the following picture the jack is not positioned in the center of the boat where it should be, and in actuality the single piece of plywood in the arm would butt right up against it. This picture shows one-half of the actual set up).
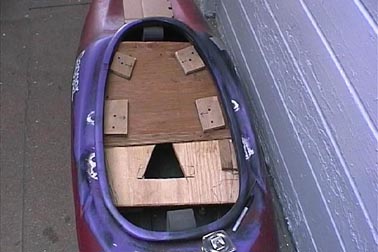
I then screwed square pieces of plywood on to the form so that it fit right up against the walls of the cockpit so that the form itself would not slide forward or backwards or left or right while it was being jacked up.
I then put small shims at different points between the form and the cockpit rim itself in order to tighten up and make the form fit even more precisely against the entire bottom of the cockpit that was going to be lifted. I then marked with a pencil around the edges of the shims and numbered them, so I would know where to put them again when I got ready for the final operation.
The idea is to have all of this ready to go before you duct tape the tubes in place.That way all of your poking and checking and experimenting is completed, so you don't risk tearing the tubes after you duct tape them. |
|
|
CBoats.net is managed by Adam Pearsall and Kenneth Sarzynski
with graphic artwork by Sara Pearsall
© 2026 by CBoats.net - all rights reserved. Materials found on this website can only be used for personal use. |